A tribute to the humble “leave form” – Part 6
[Note: It appears that SharePoint magazine has bitten the dust and with it went my old series on the “tribute to the humble leave form”. I am still getting requests to a) finish it and b) republish it. So I am reposting it to here on cleverworkarounds. If you have not seen this before, bear in mind it was first published in 2008.]
Hi again
When I started this series of articles, I knew it would be quite a few parts and ambitious in its way. But after reading some of the other great articles on SharePoint Magazine, such as Bjørn Furuknap’s first article on customising the user experience, I’m now feeling like I picked the easiest topic of all!
Seriously, Bjørn, part 1 of your series is the closest experience I can imagine to any man giving birth! I bet you feel relieved getting that one out of your system!
So, do I feel guilty that my subject matter is easier? Am I suffering nerdiness envy?
Hell, no! I’ll stick to my fantasy world of user acceptance testing with Homer Simpson any day!
Previously…
Given that there are big time gaps in getting these articles out, I’d just like to reiterate that this series is pitched at a very wide audience, so hard-core nerds will probably find it waffly and frustrating. But then again, most regular people find hard core nerds waffly and frustrating ![]() .
.
I have been writing this series from the point of view of a frustrated implementation developer/engineer who has to deal with a clueless business development manager and a difficult customer. This, of course, is completely unfamiliar territory for all implementation developer/engineers because none of you reading this would have ever experienced such a situation, right? … hehe ![]()
Part one of this series introduced some background and provided the requirements for the leave application/approval process for the Springfield nuclear power plant. Those requirements were:
- Automatic identification of requestor
- Reduce data entry
- Validation of dates, specifically the automatic calculation of days absent (excluding weekends)
- Mr Burns is not the only approver, we will need the workflow to route the leave approval to the appropriate supervisor
- We have a central leave calendar to update
Parts two to four were really the “slick presales demo” parts of this series where the world is promised to the client and, hence, expectations were completely off the planet. Thus, we started out nice and easy in part two and three, where we introduced InfoPath 2007 and went through the exercise of importing the existing Springfield MSWord based form. We then added some data entry controls and tidied up the formatting. In part four, we published this form to SharePoint itself.
All in all, the first four articles covered some pretty straightforward stuff. Now, however, the salesman has moved on and our intrepid engineer is starting to get into the pointy end of things. In part five we delved into the scary world of web services and InfoPath data connections so satisfy the requirement of automatic identification of the requestor. That was a bit of a jump, wasn’t it?
This time around, let’s take care of the “reduce data entry” requirement, and leverage some of InfoPath’s useful features to make our form smarter. For those who found article 5 a bit heavy, this one is actually quite a bit easier (but it’s just a brief lull before we get to coding!). At the end of part 5 I said I’d deal with how to automagically handle the employee number – but I have decided to take care of that a little later.
Preventing a rift in the space-time continuum
Yeah, I know I was using the Simpsons theme for this series, but today I am dropping in a dash of Heroes.
First up, we need to add some logic to the form so that it doesn’t submit crap (that’s the technical term for “invalid”) information. For example, we want to make sure that you cannot return to work on a date *before* you leave – unless you’re Hiro Nakamura, of course.
Generally, for the rest of us who cannot bend time, you do actually come back to work at some point *after* you leave, so let’s make the necessary changes to ensure that our form does not destroy the world in some space-time vortex.
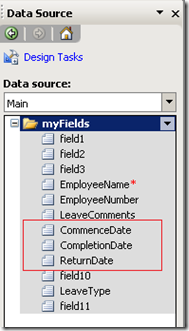
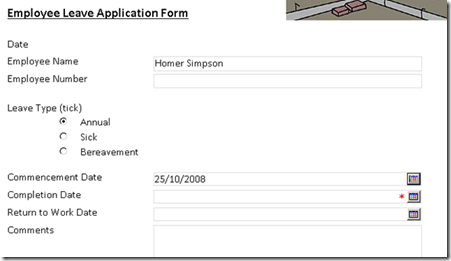
Today we are interested in the three date/time fields as shown below.
If you recall in part three where we created the form controls, we gave them the meaningful names of CommenceDate, CompletionDate, ReturnDate.
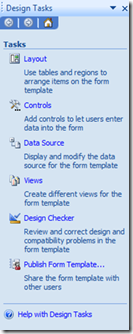
For reference, at any time, you can review your field names easily by clicking the “Data Source” link in the InfoPath design pane as shown below.
So, we have these three date fields and the rules are:
- The completion date cannot be *before* the commencement date.
- The return to work date cannot be *before* the completion date.
When you think about what we are doing here, we are validating data to make sure that it matches our business rules. Fortunately for us, InfoPath has some nice capabilities here to assist. Even better, they called it “Data Validation”. So, let’s take a closer look…
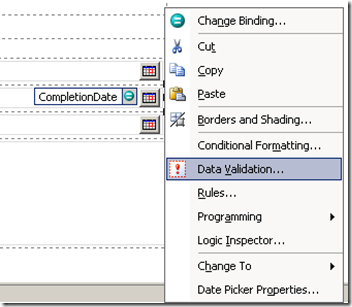
- Select the “Completion Date” control, right click and choose “Data Validation”
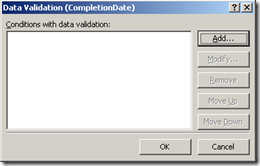
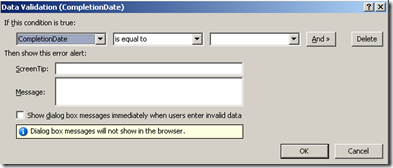
You are presented with a fairly unexciting text box asking you to add a condition that determines whether the value entered is valid. Clicking the “Add…” button displays the dialog box to add a condition. It is quite common to have multiple conditions that need to be satisfied in order for the data entered to be considered valid.
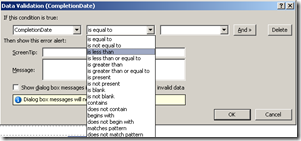
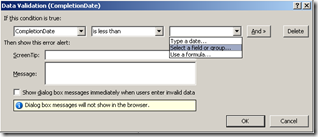
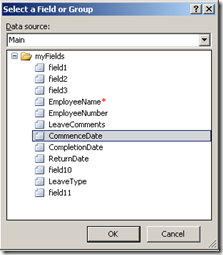
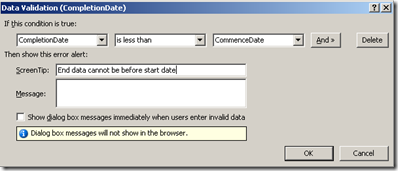
In our case, we wish to ensure that the CompletionDate field cannot contain a value that is less than the CommenceDate field. Create this condition by specifying “less than” from the middle drop down box, and then picking the “CommenceDate” field for the third dropdown box.
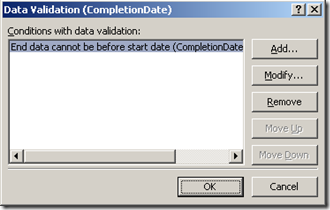
Clicking OK and we have our completed validation condition!
One final OK and we are back at our form and ready to test this. Rather than publish the form to SharePoint now, we can make use of InfoPath’s “Preview” button on the toolbar and test it out. Below I have an example preview where Homer has been identified as per the previous post. Additionally, I have used the date picker to specify the commencement date (October 25 2008) of leave.
What do you now see on the Completion Date field? What’s with that red asterix? Maybe I should hover my mouse over it and take a look, eh?
Aww… How sweet! A tooltip that matches the description I gave for this data validation condition. Well, what do you know? I spelt data instead of date (don’t worry I’ll fix it up later).
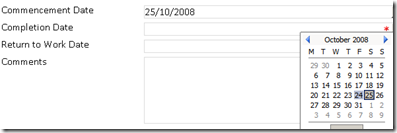
So, let’s try and defy time, then. I will enter October 24th as my return date. Doesn’t seem vary happy does it?
But if I change the date to the 25th of October (therefore validating the rule we set up), InfoPath happily accepts the value.
That it? That was easy!
Yeah, it was very easy so what are you complaining about? Easy is good and there should be more of it!
We now need to do the same thing for the “Return to Work” form field. Essentially, we perform the very same steps and thankfully for the both of us, I am not going to smother you with screenshots. This is where you try it yourself and instead I will simply list the steps and one screenshot.
- Right click the ReturnDate field and choose Data Validation
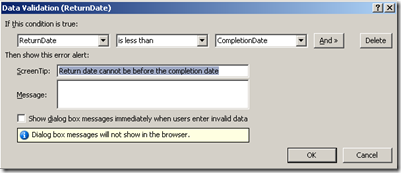
- Add a new validation condition where the ReturnDate is less than the CompletionDate
- Add a tooltip text “Return date cannot be before the completion date”
- Click OK twice and test using the preview button
The published experience
Now that we have successfully tested the validation rules for the date fields, let’s publish the form to SharePoint and see what it all looks like. I followed the exact publishing steps that I outlined in part 4, so please refer to that article if you need a recap.
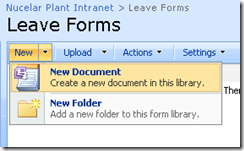
I navigated to the forms library as described in part 4 and created a new form.
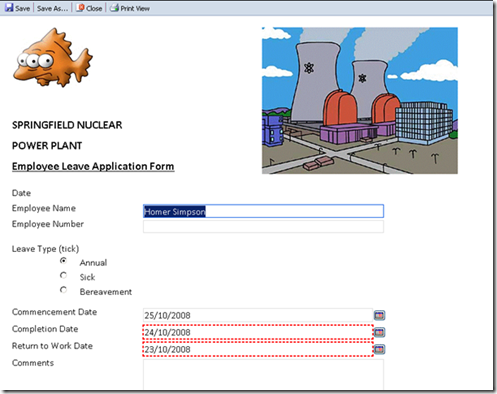
I then deliberately entered bad data into the form and sure enough, the data validation rules picked up on the issue. Excellent – Waylon Smithers is very pleased!
Reviewing our progress…
So, since we are about to see off part 6, our Project Manager wants to get a status update on how the Springfield leave form project is progressing. So, after 6 articles, what have we achieved? To remind you, the requirements were:
- Automatic identification of requestor
- Reduce data entry
- Validation of dates, specifically the automatic calculation of days absent (excluding weekends)
- Mr Burns is not the only approver, we will need the workflow to route the leave approval to the appropriate supervisor
- We have a central leave calendar to updateIdentification of Homer is now sorted, and we have taken steps both in the areas of reducing data entry and validating the dates (excluding days absent). So, we are tracking nicely and haven’t fallen behind schedule just yet
 .
.
Before we continue with addressing all of these requirements, we will have to take a bit of a detour as I explain below.
Too good to be true?
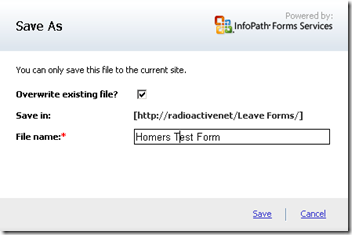
Here’s a little experiment for you to try. On the above form, published in its current form with deliberately invalid dates (highlighted in red), you will see a toolbar that has a “Save”, “Save As”, “Close” and “Print View” on it. I clicked the Save As button and was dutifully prompted for a filename. I called the form “Homer’s Test Form” as shown below and clicked Save
I then closed the form and checked out the form library on the http://radioactivenet site. What the…! It saved it! What’s the point of data validation if you can just save the form anyway?
The answer to that question, my friends, is there is a difference between saving a form and submitting a form. But you will have to wait for part 7 of this series for that riveting discussion!
Thanks for reading
Paul Culmsee






Leave a Reply